Let's Master AI Together!
How to Install and Use Ollama to Run AI LLMs on Your Windows 11 PC
Written by: Chris Porter / AIwithChris
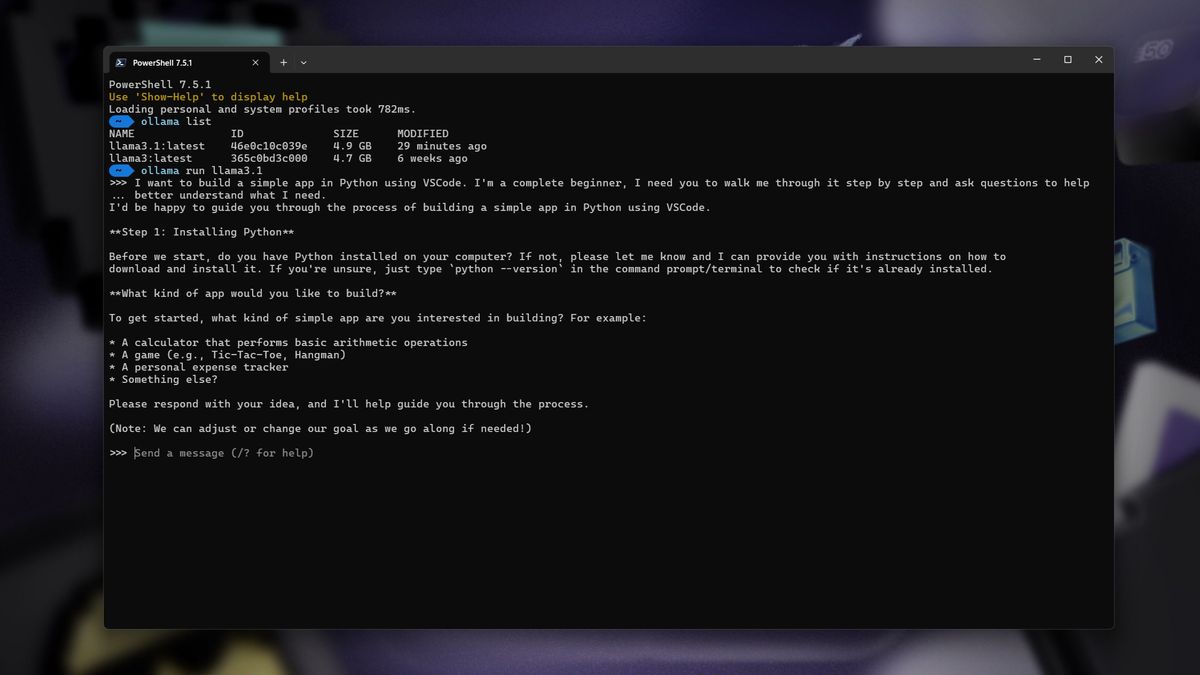
Image source: Future PLC
Getting Started with Ollama on Windows 11
The advent of AI language models has transformed the landscape of technology, allowing users to generate human-like text with astonishing accuracy. Ollama presents a user-friendly interface to manage and run such models efficiently. If you're intrigued by the power of AI and want to set up Ollama on your Windows 11 PC, this guide is crafted for you. By the end, you will gain the knowledge to harness the capabilities of AI language models at your fingertips.
Setting up Ollama involves several preparatory steps, including the installation of essential software and libraries. The first thing to note is that Ollama streamlines the execution of AI language models, so understanding the installation process and configuration is pivotal for optimal performance.
Step 1: Install Python
Before diving into the specifics of Ollama, it’s crucial to have Python installed on your Windows 11 PC. Python serves as the backbone for running AI models thanks to its vast ecosystem of libraries.
1. Visit the official Python website and navigate to the downloads section.
2. Choose the version compatible with Windows. For most users, the latest version of Python 3 is recommended.
3. Download the installer, and when prompted during installation, make sure to check the box that says “Add Python to PATH.” This step is essential as it allows you to execute Python commands directly from the Command Prompt.
4. After installation, you can verify Python's presence by opening Command Prompt and typing `python --version`. If installed correctly, you will see the installed version of Python.
Step 2: Set Up a Virtual Environment
Using a virtual environment is a best practice when working with Python projects, including those utilizing AI language models. It creates an isolated environment that helps manage dependencies without affecting your system-wide Python installation.
1. Open Command Prompt.
2. Navigate to your working directory where you want to create the project folder using `cd `.
3. Create a virtual environment by running the command:
python -m venv myenv
4. Activate the virtual environment using:
myenv\Scripts\activate
5. After activation, your command line prompt will change, indicating that you are now operating within the virtual environment.
Step 3: Install Required Libraries
With Python and the virtual environment set up, the next step is to install the libraries necessary for running language models. The two primary libraries are `transformers` for accessing pre-trained models and `torch` for running tensor computations.
In your activated virtual environment, run the following commands:
pip install transformers torch
These commands will fetch and install the necessary libraries from the Python Package Index (PyPI). Depending on your internet speed, this might take some time.
After installation completes, you can confirm by running:
pip list
It will display a list of packages including `transformers` and `torch`.
Step 4: Download a Pre-trained Model
Now comes the exciting part—selecting and downloading a pre-trained model from the Hugging Face Model Hub. Hugging Face hosts a diverse selection of models that you can leverage for various tasks.
1. Go to the Hugging Face Model Hub and explore the models available.
2. Once you select a model, note the model identifier. For instance, you might choose `gpt2`.
3. Download the model directly in your Python script using:
from transformers import AutoModelForCausalLM, AutoTokenizer
model = AutoModelForCausalLM.from_pretrained('gpt2')
tokenizer = AutoTokenizer.from_pretrained('gpt2')
This code snippet will automatically fetch the model and tokenizer from Hugging Face, allowing you to commence with generating text.

Step 5: Running the Model
After acquiring the model and tokenizer, it's time to put them to use. You can construct a simple script to generate text based on user input or predefined prompts.
Below is a sample script snippet that demonstrates how to take input and produce output:
input_text = 'Once upon a time'
input_ids = tokenizer.encode(input_text, return_tensors='pt')
output = model.generate(input_ids, max_length=50)
result = tokenizer.decode(output[0], skip_special_tokens=True)
print(result)
In this example, we provide a prompt, the model generates a new text with a maximum of 50 tokens, and then we print the result on the console.
This implementation is quite basic; you can enhance it further by tweaking parameters for better output or even constructing a user interface if you plan to integrate this into an application.
Importance of Documentation and Further Learning
While this guide serves as a foundational start for installing and using Ollama and running AI LLMs, diving deeper into the official documentation of the libraries will provide additional insights. The Hugging Face and PyTorch documentation is replete with resources to help users optimize their implementations.
Engaging with online communities dedicated to AI and machine learning can also be immensely beneficial. Here, users share their experiences and troubleshooting tips, which could aid your development journey.
Conclusion
Equipped with Ollama and your Windows 11 PC, you now possess the essential skills to run AI language models. This transformative technology offers unparalleled creative and practical applications. Hopefully, this guide empowers you to kickstart your journey into the fascinating world of AI.
For more insights on AI applications and tutorials, join us at AIwithChris.com. Together, let's unlock the potential of artificial intelligence!
_edited.png)
🔥 Ready to dive into AI and automation? Start learning today at AIwithChris.com! 🚀Join my community for FREE and get access to exclusive AI tools and learning modules – let's unlock the power of AI together!